


Oil Change 101: When and How to Do It Yourself
Every seasoned driver knows that beneath the gleaming exterior of your car lies a complex heart of pistons, valves, and bearings, all pumping with something more vital than blood: engine oil. Think of oil as your engine’s elixir—flowing through every nook and cranny to lubricate moving parts, ward off friction, and carry away microscopic debris. Ignore this golden fluid, and your engine will seize, falter, or worse—leave you stranded on the roadside. Yet, with a little know-how and the right tools, changing your own oil can be not just a cost-saving chore, but a satisfying ritual that deepens your bond with your car.
Why Oil Changes Matter?
Over time, even the best synthetic oils degrade, losing their viscosity and protective additives. Contaminants like dust, metal shavings, and combustion by-products accumulate, turning slick lubricant into a gritty sludge. Fresh oil maintains proper hydraulic pressure, ensures smooth valve operation, and prevents overheating—especially under the stress of stop-and-go traffic or highway cruising. In essence, an oil change is preventive maintenance 101: it safeguards engine health, optimizes fuel economy, and prolongs the life of every moving part.
When to Change Your Oil?
Manufacturers advise changing conventional oil every 5,000 to 10,000 km (3,000 to 6,000 miles) and premium synthetic oil every up to 15,000 km (9,000 miles). But driving practices are crucial: short journeys, towing, and dusty conditions all hasten oil degradation. Consult your owner’s manual, but also trust your senses—if you notice increased engine noise, diminished throttle response, or dark, thick oil on your dipstick, it’s time to act.
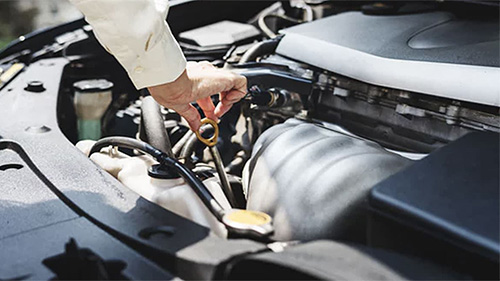
Gathering Your Tools
To do the task, a professional garage is not necessary. All you need is a drain pan, new oil, a socket wrench, an oil filter wrench, a solid jack and stands, and a new filter. Choose oil that meets your engine’s specifications—API rating, viscosity grade, and any manufacturer approvals. And don’t forget gloves and rags; a clean workspace makes for a cleaner job.
Step-by-Step Guide
Warm Up & Secure: Run the engine for a few minutes to warm the oil—this helps it flow freely—then park on level ground and engage the parking brake.
Drain the Old Oil: After removing the drain plug and sliding the drain pan below the oil pan, the oil will squirt out into the pan. Here, patience is rewarded; watch until the flow stops dribbling.
Replace the Filter: Loosen the old filter, remove it carefully (it will be full of oil), and coat the new filter’s rubber gasket with a dab of fresh oil. Screw it on hand-tight.
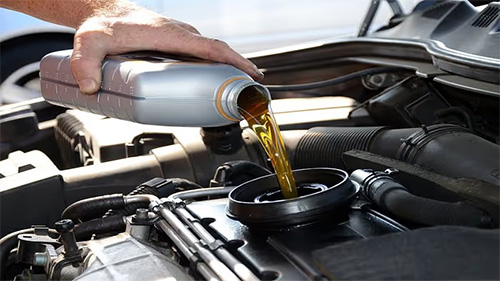
Refill & Check: Reinstall the drain plug with a fresh crush washer if needed. Pour in the specified amount of new oil, start the engine briefly, then shut it off and check the level on the dipstick—add more if necessary.
Beyond the obvious cost savings—professional oil changes can run $50–$100—DIY maintenance grants you firsthand insight into your vehicle’s condition. You’ll spot leaks, catch unusual debris, and gain confidence under the hood. Plus, there’s a genuine thrill in knowing you’ve personally extended your car’s life by thousands of kilometers.